Table of Contents
Introduction
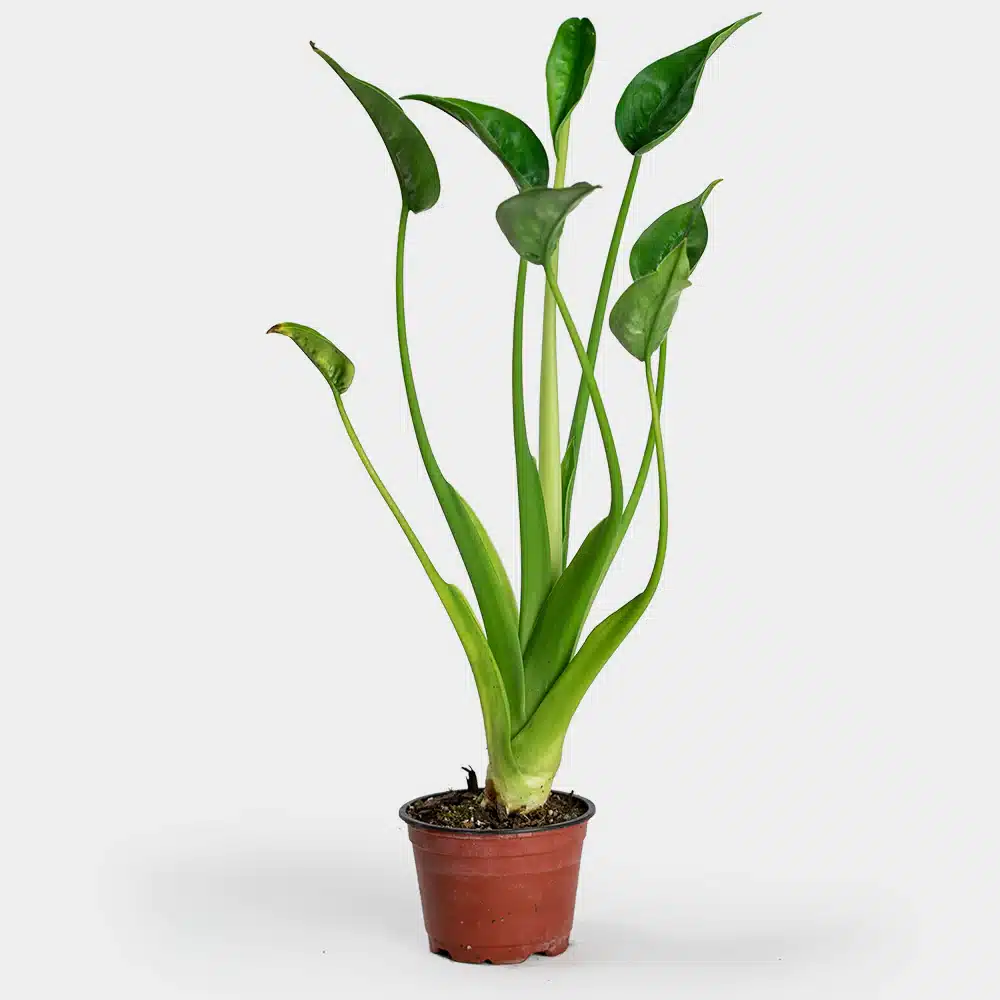
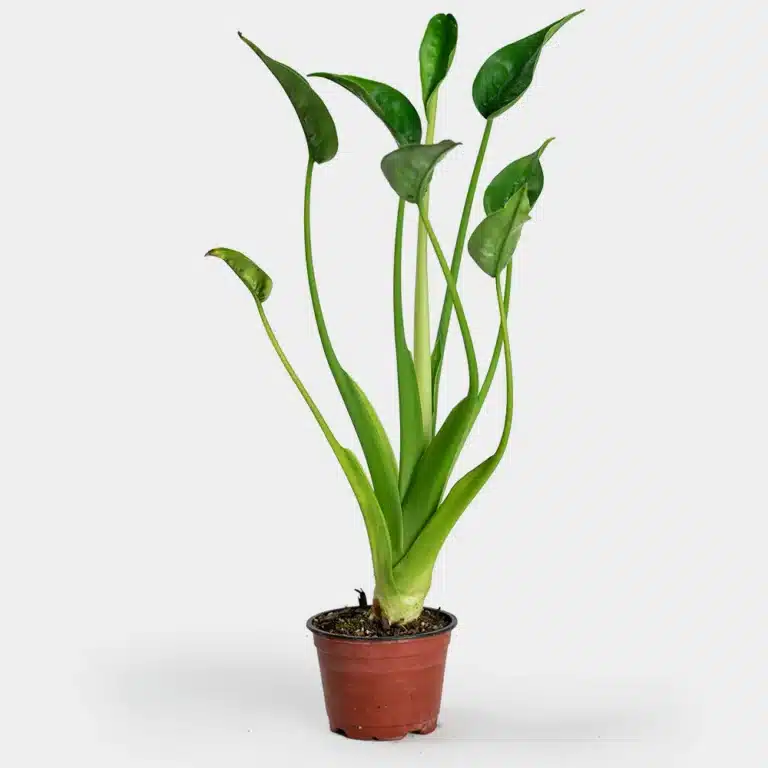
The Alocasia tiny dancer plant, a captivating hybrid of Alocasia brisbanensis and Alocasia odora, is renowned for its compact size and striking visual appeal. With its graceful foliage and unique appearance, this plant adds a touch of elegance to any indoor space. However, it requires precise care and attention to thrive, making it a beloved choice among plant enthusiasts who appreciate its exacting needs and unparalleled beauty.
Exploring 12 Varieties of Alocasia Plants
Alocasia Amazonica: Known for its striking, arrowhead-shaped leaves with deep green veins contrasting against vibrant purple undersides, the Alocasia Amazonica adds a tropical flair to any space.
Alocasia Tiny Dancer: The Alocasia Tiny Dancer features petite, heart-shaped leaves with distinct silver veining, making it a charming addition to small spaces or as a tabletop accent.
Alocasia Silver Dragon: With its shimmering silver foliage and prominent dark green veins, the Alocasia Silver Dragon brings an air of elegance and sophistication to indoor gardens or shaded outdoor areas.
Alocasia Black Velvet: The velvety, jet-black leaves of the Alocasia Black Velvet create a dramatic statement, offering a striking contrast against its surroundings and adding a touch of mystery to any collection.
Alocasia Dragon Scale: Named for its unique textured leaves resembling dragon scales, the Alocasia Dragon Scale boasts a mesmerizing appearance and is sure to capture attention wherever it’s placed.
Alocasia Frydek: Characterized by its deep green, heart-shaped leaves adorned with contrasting white veins, the Alocasia Frydek exudes a sense of tranquility and natural beauty, making it a popular choice for indoor plant enthusiasts.
Alocasia Jacklyn: The Alocasia Jacklyn features glossy, emerald-green leaves with prominent silvery veins, adding a touch of sophistication and refinement to contemporary interiors or tropical-themed gardens.
Alocasia Stingray: True to its name, the Alocasia Stingray showcases unique, arrowhead-shaped leaves that curl upwards, resembling the graceful movement of a stingray gliding through water, making it a captivating focal point in any setting.
Alocasia Maharani: The Alocasia Maharani, or “Queen Alocasia,” commands attention with its majestic stature and large, glossy leaves accented by intricate silver veining, making it a regal addition to any plant collection.
Alocasia Polly: With its compact size and vibrant green leaves edged in silver, the Alocasia Polly is a versatile choice for adding a pop of color and texture to tabletop displays or small spaces.
Alocasia Zebrina: Featuring elongated leaves adorned with bold zebra-like stripes, the Alocasia Zebrina adds a touch of the wild to indoor and outdoor spaces, making it a popular choice for modern, jungle-inspired interiors.
Alocasia Regal Shield: Renowned for its large, shield-shaped leaves and striking veins, the Alocasia Regal Shield commands attention in both indoor and outdoor settings, offering a bold and elegant aesthetic to any collection.
How to Grow and Care for Alocasia Tiny Dancer Plant
Growing and caring for an Alocasia Tiny Dancer plant requires attention to its specific needs. Here are some guidelines:
Light: Place your Alocasia Tiny Dancer in bright, indirect sunlight. Avoid direct sunlight, as it can scorch the leaves. However, too little light can result in leggy growth and reduced leaf coloration.
Watering: Keep the soil consistently moist but not waterlogged. Water when the top inch of soil feels dry to the touch, typically every 1-2 weeks. Ensure proper drainage to prevent root rot.
Humidity: Alocasia Tiny Dancer plants thrive in high humidity environments. Mist the leaves regularly or place a humidifier nearby to maintain humidity levels. Alternatively, you can place the pot on a pebble tray filled with water.
Temperature: These plants prefer warm temperatures between 65°F to 80°F (18°C to 27°C). Avoid exposing them to temperatures below 60°F (15°C) as it can cause damage to the leaves.
Soil: Use well-draining, aerated potting soil rich in organic matter. A mixture of peat moss, perlite, and compost works well. Ensure the pot has drainage holes to prevent waterlogging.
Fertilization: Feed your Alocasia Tiny Dancer plant with a balanced liquid fertilizer diluted to half strength every 2-4 weeks during the growing season (spring and summer). Avoid fertilizing during the dormant period in fall and winter.
Pruning: Remove any yellowing or damaged leaves promptly to maintain the plant’s health and appearance. Use clean, sharp scissors or pruning shears to make clean cuts.
Repotting: Repot your Alocasia Tiny Dancer plant every 1-2 years, or when it outgrows its current pot. Choose a pot that is one size larger and refresh the soil to provide fresh nutrients.
Pests and Diseases: Keep an eye out for pests like spider mites, aphids, and mealybugs. Treat infestations promptly with insecticidal soap or neem oil. Ensure good air circulation to prevent fungal diseases.
By following these care guidelines, you can enjoy a healthy and thriving Alocasia Tiny Dancer plant, adding beauty and greenery to your indoor space.
7 Steps for Propagating Alocasia Tiny Dancer Plant
Propagating an Alocasia Tiny Dancer plant can be done through division or by rooting stem cuttings. Here are the steps for each method:
Propagation by Division:
Preparation: Prepare a new pot with well-draining, moistened potting soil. Ensure the pot has drainage holes.
Plant Inspection: Carefully remove the Alocasia Tiny Dancer plant from its pot and inspect the rhizome (underground stem) for natural divisions or offsets. These are smaller sections of the rhizome that can be separated to propagate new plants.
Division: Using a clean, sharp knife or scissors, carefully separate the offsets from the main rhizome, ensuring each division has roots attached.
Planting: Plant each division in its own pot filled with fresh potting soil. Position the rhizome just below the soil surface and gently firm the soil around it.
Watering: Water the newly potted divisions thoroughly to settle the soil around the roots. Keep the soil consistently moist but not waterlogged during the establishment period.
Care: Place the newly potted divisions in a warm, humid location with bright, indirect light. Maintain high humidity levels by misting the plants regularly or using a humidity tray.
Propagation by Stem Cuttings:
Selecting a Cutting: Choose a healthy stem with at least one leaf. Ideally, select a stem that has a node (where leaves attach) as this is where roots will develop.
Cutting: Using clean, sharp scissors or pruning shears, make a clean cut just below a node on the stem. The cutting should be 4-6 inches long.
Rooting Hormone (Optional): Dip the cut end of the stem into rooting hormone powder to encourage root development, although this step is optional.
Potting: Plant the cutting in a small pot filled with well-draining potting mix. Insert the cutting into the soil, ensuring the node is buried while the rest of the stem remains above the soil.
Watering: Water the soil thoroughly after planting to settle it around the cutting. Keep the soil consistently moist, but avoid overwatering to prevent rot.
Humidity and Light: Place the potted cutting in a warm, humid environment with bright, indirect light. Maintain high humidity levels by covering the cutting with a clear plastic bag or placing it in a propagation box.
Root Development: Over the next few weeks, roots should begin to develop from the node. Once roots are well-established, the cutting can be treated as a mature plant.
By following these steps, you can successfully propagate your Alocasia Tiny Dancer plant, creating new plants to enjoy or share with fellow plant enthusiasts.
7 Benefits of Alocasia Tiny Dancer Plant
Air Purification: Like many houseplants, the Alocasia Tiny Dancer contributes to indoor air quality by absorbing harmful pollutants such as formaldehyde, benzene, and xylene from the air, thus helping to create a healthier indoor environment.
Humidity Regulation: Alocasia Tiny Dancer plants transpire water through their leaves, which can help increase humidity levels in indoor spaces. This is particularly beneficial in dry climates or during the winter months when indoor air tends to be drier.
Stress Reduction: Caring for plants, including the Alocasia Tiny Dancer, has been shown to reduce stress and promote relaxation. The act of nurturing a living organism and observing its growth can have a calming effect on the mind and body.
Biophilic Design: Incorporating plants like the Alocasia Tiny Dancer into indoor spaces enhances biophilic design, which aims to connect people with nature. This can improve mood, productivity, and overall well-being by fostering a sense of connection to the natural world.
Conversation Starter: The unique appearance of the Alocasia Tiny Dancer plant often sparks conversations and serves as a focal point in interior décor. It can be an excellent icebreaker and a source of joy for plant enthusiasts and visitors alike.
Educational Opportunity: Growing and caring for an Alocasia Tiny Dancer plant provides an educational opportunity, especially for children, teaching them about plant biology, ecology, and the importance of environmental stewardship.
Decorative Element: With its compact size and striking foliage, the Alocasia Tiny Dancer adds beauty and visual interest to any indoor space, whether it’s placed on a windowsill, desk, or as part of a larger indoor garden display.
Overall, the Alocasia Tiny Dancer plant offers not only aesthetic pleasure but also tangible benefits for both physical and mental well-being, making it a valuable addition to any indoor environment.
Common Pests
Spider Mites: These tiny pests are common on indoor plants, including Alocasias. They feed on plant sap and can cause yellowing leaves, stippling, and webbing on the undersides of leaves.
Mealybugs: Mealybugs are small, soft-bodied insects that often appear as white, cottony masses on plant stems and leaves. They suck sap from the plant, leading to stunted growth and yellowing leaves.
Aphids: Aphids are small, pear-shaped insects that feed on plant sap. They can be green, black, brown, or pink in color and are often found clustered on new growth. Aphids can cause distorted growth and transmit diseases.
Scale Insects: Scale insects are small, oval-shaped pests that attach themselves to plant stems and leaves. They feed on plant sap and can cause yellowing, wilting, and leaf drop if left untreated.
Fungus Gnats: Fungus gnats are small, flying insects that are attracted to moist soil. While the adults are mostly harmless, their larvae feed on plant roots, which can lead to root damage and poor plant growth.
Thrips: Thrips are tiny, slender insects that feed on plant tissue by sucking out the contents of cells. They can cause distorted growth, silvering of leaves, and stippling.
Common Problems
Yellowing Leaves: Yellowing leaves can indicate various problems, including overwatering, underwatering, inadequate light, or nutrient deficiencies. Ensure the plant is receiving proper care and adjust watering, light, and fertilizer accordingly.
Leaf Browning or Edges Turning Brown: Browning of leaf edges can be caused by underwatering, low humidity, or exposure to dry air or drafts. Increase humidity levels around the plant, ensure consistent watering, and avoid placing it near heating or cooling vents.
Leaf Dropping: Leaf dropping can occur due to sudden changes in environmental conditions, such as temperature fluctuations or drafts. Ensure stable conditions for the plant and avoid moving it frequently.
Root Rot: Root rot is a fungal disease caused by overwatering or poorly draining soil. Symptoms include yellowing or wilting leaves and a foul odor from the soil. If root rot is suspected, remove the plant from its pot, trim away any rotting roots, and repot in fresh, well-draining soil.
Pests: Alocasia Tiny Dancer plants can be susceptible to pests such as spider mites, mealybugs, aphids, and scale insects. Regularly inspect the plant for signs of pests, and treat infestations promptly with insecticidal soap or neem oil.
Fungal Diseases: Fungal diseases such as powdery mildew or leaf spot can occur, especially in humid conditions or if the plant is overwatered. Ensure good air circulation around the plant, avoid overhead watering, and remove affected leaves promptly to prevent the spread of disease.
Wilting: Wilting can be a sign of underwatering, overwatering, or root rot. Check the soil moisture levels and adjust watering accordingly. If the soil is consistently wet, root rot may be the issue, requiring immediate attention.
Stunted Growth: Stunted growth can occur due to various factors, including inadequate light, nutrient deficiencies, or overcrowded roots. Ensure the plant is receiving proper light, fertilize regularly during the growing season, and repot if the roots are crowded.
FAQs
How often should I water my Alocasia Tiny Dancer?
Water your Alocasia Tiny Dancer plant when the top inch of soil feels dry to the touch. Avoid overwatering, as this can lead to root rot.What kind of light does the Alocasia Tiny Dancer prefer?
Alocasia Tiny Dancer plants prefer bright, indirect light. Avoid direct sunlight, as it can scorch the leaves. They can tolerate lower light conditions, but growth may be slower.How do I increase humidity for my Alocasia Tiny Dancer plant?
Increase humidity levels around your Alocasia Tiny Dancer plant by misting the leaves regularly, placing the pot on a humidity tray filled with water and pebbles, or using a room humidifier.Why are the leaves of my Alocasia Tiny Dancer turning yellow?
Yellowing leaves can be caused by overwatering, underwatering, inadequate light, or nutrient deficiencies. Assess the plant’s care routine and make adjustments as needed.How do I propagate my Alocasia Tiny Dancer plant?
Alocasia Tiny Dancer plants can be propagated through division or by rooting stem cuttings. Divisions can be made by separating offsets from the main rhizome, while stem cuttings can be rooted in moist soil or water.What should I do if I notice pests on my Alocasia Tiny Dancer?
If you notice pests such as spider mites, mealybugs, or aphids on your Alocasia Tiny Dancer plant, treat the infestation promptly with insecticidal soap, neem oil, or a similar natural pesticide.How can I prevent root rot in my Alocasia Tiny Dancer plant?
To prevent root rot, ensure your Alocasia Tiny Dancer plant is potted in well-draining soil and that the pot has drainage holes. Avoid overwatering and allow the soil to dry out slightly between waterings.Is the Alocasia Tiny Dancer plant safe for pets?
Alocasia Tiny Dancer plants contain calcium oxalate crystals, which can be toxic to pets if ingested. Keep the plant out of reach of pets and seek veterinary attention if ingestion occurs.
Share this post: